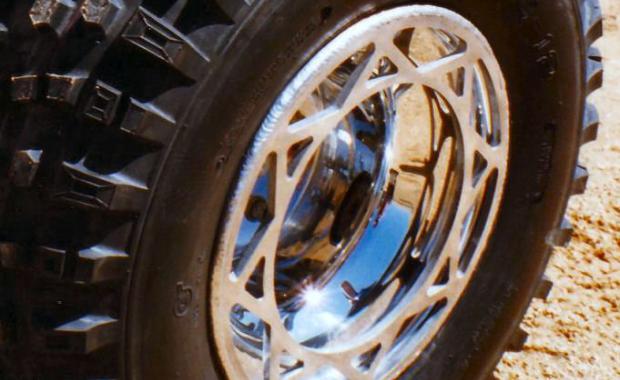
Aluminium racing wheels are designed to be both light and strong. Light enough to optimise steering and suspension response, and strong enough to withstand the rigours of off-road racing. Here’s some tips and tricks for looking after and working with them.
Fitting Tyres
Aluminium wheels are expensive and relatively soft, so use a square of carpet or rubber mat to work on when fitting or removing tyres, to protect the rims. Temporarily remove the valve cores from the stems to allow free movement of air.
Set the outer side of the wheel down on the carpet. You’ll notice the inner portion of wheels have a different shape to the outer portion. This “waisted” shape is to allow the tyre bead to sit deep into the wheel for mounting. Don’t attempt to fit or remove tyres from the outer side with the valve stem.
Kneel before the wheel and pray to the Racing Gods that the mating will go well and yield a grippy tyre! Some tyres can be difficult to fit, especially first timers (even with a bit of praying), so a little lubricant is necessary to help ease the tyre on. Never use mineral based lubricants such as Inox or WD40, as they don’t evaporate, and will always remain. If the tyres are permanently lubricated, they could easily peel off the rim during hard cornering, or even permit the wheel to spin inside the tyre under hard acceleration.
Water-based lubricants are best, as they evaporate, leaving the tyre rubber to grip the rim. There are proprietary products available, but plain old dish washing liquid in a bucket of water is just as effective.
Swab some soapy water liberally over the tyre beads with a brush, and ram the first bead onto the wheel, pushing it as far into the waisted area of the wheel as possible. Keep the bead tight into the wheel waist with one hand, and then force the remainder of the bead down over the rim with the other hand.
If fitting a tube in the tyre, it should be inserted at this stage. Push the valve stem of the tube through the hole in the wheel, and start the nut on the stem, but don’t tighten it yet.
The second bead should go on in the same manner as the first, but if it’s really tight, some very gentle assistance from a tyre lever may be necessary for the last little bit. Never use a tyre lever directly against the aluminium wheel, always keep a scrap piece of carpet or rubber mat handy for a pad. If a tube is being used, be very careful not to nip it with the lever.
The tyres now have to be seated, which requires a lot of air pressure, and a little common sense. The tyre’s inflation pressure will be moulded on the side of the tyre. Don’t exceed this pressure. If the inflation pressure isn’t marked on the tyre, don’t exceed 35 PSI.
Don’t try to inflate a brand new tyre with one of those small 12 volt emergency compressors. You’ll need a commercial type compressor with a storage tank. It’s the instant volume of air that’s needed to seat a tyre, not just pressure.
If the tyre is new, the beads may not want to seat on the rim, in which case, stand the wheel vertically, and bounce it a couple of times, and if necessary, push the centre of the tyre down with your knee to squash the beads out. If air is escaping at some point, try thumping the tyre near the leak while still applying air. Sometimes the shock will make the bead bounce onto the rim.
As a last resource, wrap a tie-down around the centre of the tyre, and take up the slack. Resume inflating, and the resistance at the centre of the tyre should force the beads out onto the rim.
Once the beads grip the rim, lay the wheel flat again, and continue inflating until the beads seat with a loud pop. Make sure you keep your fingers well away from the bead and rim. Reinstall the valve core, and re-inflate to the correct pressure, bouncing the tyre a couple of times to centre it.
If the beads won’t fully seat before the pressure limit is reached, stop inflating, and replace the valve cores. Inflate again to about 10 PSI below the recommended pressure, and leave the wheel and tyre in strong sunlight. The warmth will soften the rubber, and also increase the pressure inside the tyre again until it finally seats with a loud pop.
It’s not uncommon for one bead to seat perfectly, and the other to hang up. If this happens, release the pressure, push down on the bead where it’s hung up, swab with more soapy water, and reinflate while thumping the area around the hang up.
Removing tyres
Remove the valve core. Use a bead breaker to break the tyre bead away from the rim, being careful not to damage the soft aluminium. Rotate the wheel 90 degrees, and break the bead away again. Flip the wheel over, and similarly break the second bead.
With the wheel outer-side down on the carpet, ram the bead down into the waist as before, swab with soapy water, and start pulling the bead up over the rim. The tyre lever may again be required to pry the last bit up and over. Remove the inner tube carefully, if fitted. Pull the second bead up into the waist, and pry it up over the rim.
Valvle Stems
If you’re going to run tubeless tyres, then valve stems will need to be fitted to the wheel rims. The simplest valve stems to fit are the screw-in type, which are inserted through the valve holes from the inside of the wheels, and the nuts tightened onto them from the outside.
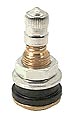
Rubber valve stems require a special tool to pull them into their holes. They’re not as durable as the all-metal ones.
Wheel maintenance
To prevent the soft aluminium from being damaged, only use thick hardened steel washers, under the Nyloc mounting nuts. Make sure the smoothbeveled face of the washer goes against the wheel. Observe the correct torque values when tightening the nuts.
Lightly wipe the surface of the wheel with Inox or WD40, as this will prevent mud from sticking to them, and unbalancing them. Inox will also make the wheels easier to clean.
While racing off-road, the wheels will be subjected to all sorts of immovable objects, rocks and debris. Regularly check your wheels and tyres for damage. Periodically deflate the tyres, and remove any grass and dirt that has become trapped between the rim and tyre bead. Also check the area around the bolt holes for cracks radiating from them. All racing equipment has a limited life expectancy, and wheels are no different. If the wheel shows excessive damage such as dents or cracks, don’t take any risks, just replace it.
What about the Tyres?
Keeping the tyres inflated to around their maximum is about the best thing you can do to protect your rims. This is one reason why we have moved away from the cheap, unrated, low pressure, ATV style tyres available. If you’re in the sand with less obsticles sure you can deflate the tyres to get better floatation, but don’t forget to re-inflate them on harder terrain! Purchasing tyres with a built-in rim protector (where the rubber slightly overhangs the rim edge) is also really sensible.