Want to know how to measuring and re-making CV axles? Here’s where to start…
Tools and Materials.
- 10mm drill bit and pillar drill.
- Abrasive cut-off saw, or 9” angle grinder.
- Coarse carborundum valve-grinding paste.
- Drum of kerosene, mineral turps, or thinners.
- Electrical tape, green.
- Electrical tape, red.
- Four 150mm X 3.5mm cable ties.
- Four 350mm X 3.5mm cable ties.
- Molybdenum disulphide grease.
- Nylon dish brush.
- Plastic basin.
- Tooth brush.
R6 Axle Shafts
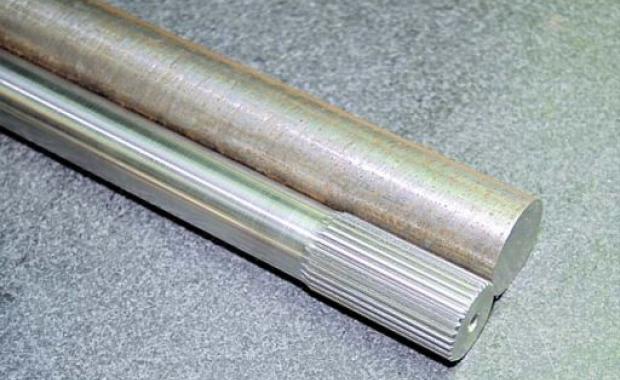
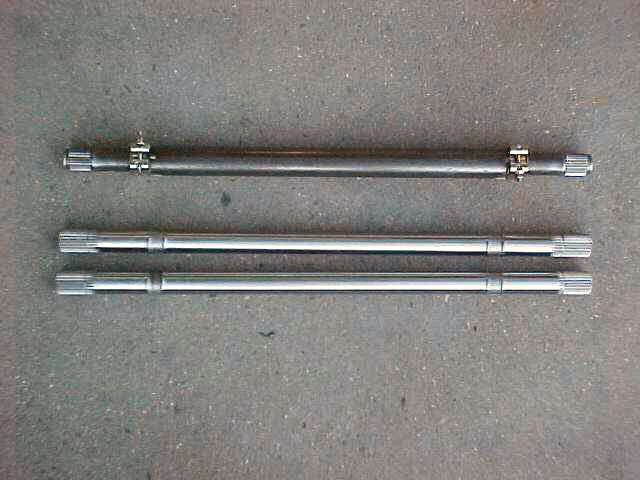
Standard Rorty R6 floating axle shafts are 690mm long, with a minimum 35mm of full splines on each end, with no shoulders or circlip grooves. The ends of the shafts should not be bevelled, but should be radiused to 4mm. Whichever company makes your billet axles will probably ask you to send them a star for them to match the splines.
Even if you are ordering billet shafts, it is highly recommended you make an axle gauge and measure your axle length precisely, in case you have varied the dimensions during the construction of your R6. Axles are expensive, so you don’t want to make any mistakes!
Your budget will determine whether you order billet axles, or cut and shut the BMW originals. You will need either three BMW axles or two new billet axles and one old BMW axle. In any event, you will need to cut up one BMW axle to make an axle gauge with.
MYO axle gauge
There is a wide variation in axle shape and design, even across one model of car. I’ve seen two completely different looking original axles fitted to one car. It doesn’t matter how many “boot bumps” are on your axles, as ultimately, the splines will be the same, and that’s all that matters.
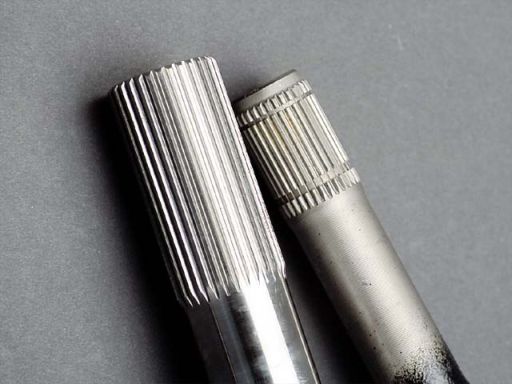
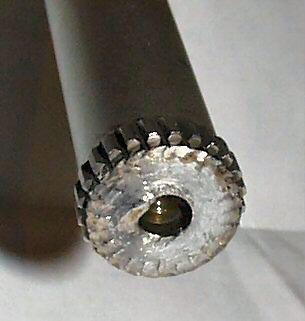
Take one of your BMW axles, and grind down the shoulders at the inner ends of the splines so that the diameter of the shoulders are reduced to just below the base diameter of the splines. This will allow a star to slide past the shoulder.
Cut 100mm off each end, and discard the centre section. Depending on the layout of your axles, you may need to grind some “boot bumps” off to allow the axles to slide into the axle gauge pipe.
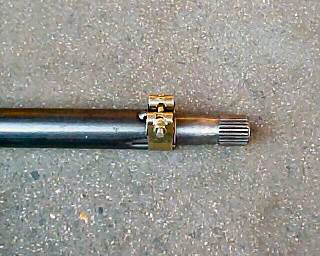
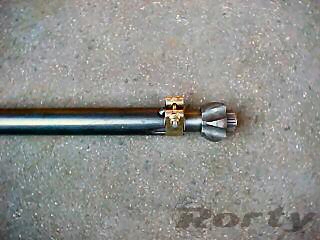
Cut a 520mm length of 4mm wall 25NB pipe (25NB-Heavy Pipe), and using a cutting disc, cut a slot in each end, through both walls, to a depth of about 50mm. Cut through the pipe’s internal weld seam in the process, to eliminate the ridge. Slide a Mikalor 32-35 clamp onto each end of the pipe, and tack weld them on.
Slide the modified axle ends into the ends of the gauge, and adjust the tension of the clamps to grip them.
Relieving the splines
Now comes the relaxing part of the whole CV tuning process. Go and get a beer from the fridge, and pull up a chair. Remember those badly pitted stars you were going to throw out? Well, you’ll need them now, along with the tub of grinding paste. Smear a liberal amount of paste into the splines in one of the stars, and slide it onto one of the short axle ends. Keep working it up and down the splines, while applying pressure first in a clockwise direction, and then in an anti-clockwise direction. Stop every so often, and remove the star completely off the axle. Rotate it an eighth of a turn, and then resume the lapping process. When the star slips up and down the axle splines with just firm finger pressure, and there are no tight spots, you’re done lapping.
Wipe the paste off with a rag, and dispose of it. If carborundum paste were to get into any moving mechanical parts, it could destroy them.
CAUTION!
Solvents are flammable, and can be explosive.
Read and observe all safety precautions on the solvent packaging.
Partially fill the plastic basin with your chosen solvent, and put it on the bench now. Use the toothbrush and solvent to remove absolutely every last trace of grinding paste from the axle splines.
When everything has had a good wash, dispose of the dirty solvent in a responsible manner, not in your neighbour’s wheelie bin, on bin night, as happened to me once with some dirty engine oil.
Measuring the axles
CAUTION!
Only measure up the axles after the chassis and suspension has been properly set up.
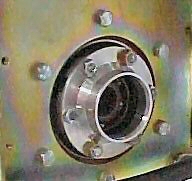
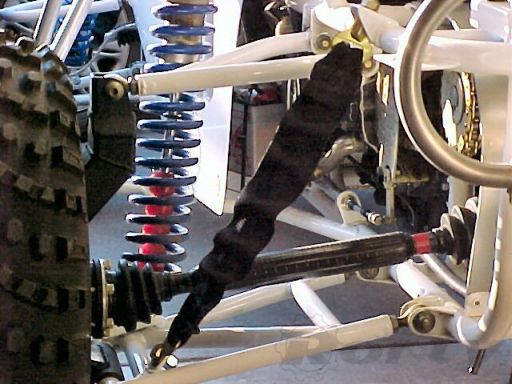
With two of the CV joints assembled in the cassette, bolt another two CV joints, with their aluminium boot flanges, onto your buggy’s rear uprights. With the rear of the buggy securely supported on stands, remove the shocks, and jack one of the lower wishbones up so the axis of the outer CV lines up with the axis of the inner CV in the cassette. Remove the bolt from the upper wishbone/upright pivot, and swing the top of the upright outwards.
Slack off the Mikalors so the axle ends can slide in and out with just a hint of resistance. Pull the axle ends outwards, so they are at their full extent, and insert one end of the gauge into one of the CVs in the cassette, then slide the other end into the CV in the rear upright. You may need to turn the wheel a little to align the CV’s star’s splines with the axle’s splines. Reconnect the upper wishbone to the upright. If you aligned the two CV axes correctly, the axle gauge will now be horizontal (at its shortestlength).
At this point the splined ends of the axle gauge should be touching the sprocket carrier in the cassette, and the rear wheel flange in the rear upright. Put white pen marks on the shaft to align with the outer edges of the inner and outer CV boot flanges.
Lock up the Mikalor clamps at this point, and give the axle a good shake, end to end, to ensure it really is metal-to-metal, and not a bit too short. Remove the top upright bolt again, and gently swing the upright out and down, until you’re able to remove the shaft.
In reality, the shaft should never go metal to metal, so, having removed the axle gauge, measure its length, subtract 8mm for clearance purposes, and write that figure down in a safe place. That’s the finished overall length of the axle.
Determining Custom Axle Lengths
The greatest distance between the CVs will be at full droop and the shortest distance between them will be when the axles are horizontal. With axles and hubs aligned, the axle length required at full droop is often longer than the available distance between the CVs when the axles are horizontal.
To accommodate the obligatory longer axles, in plan view (and with the axles perfectly horizontal), the outer CVs should lie a few centimetresbehind the inner CVs. The optimal off-set can be determined mathematically or by physical positioning and trial and error. The goal should be to attain a constant distance between the CVs throughout the suspension cycle, allowing around 5mm-10mm of axle float at all angles as a safety factor.
Making one of the axle gauges as outlined in the previous section and installing it along with two CVs is the most accurate means to arrive at the optimal CV flange positioning and axle length.
The cassette or centre drive can easily be repositioned in the chassis to obtain the optimal relationship between the CVs, but axle off-set should not be ignored or too much plunge will be present. If the distance between the CVs becomes lesser or (much) greater than the axle length, parts will begin failing fast!
Billet axles
Axle manufacturers usually stock their preferred alloy steel, the common materials being EN28 (mostly UK), 300M (mostly US) and 4140 (universal).
The axles are normally solid, but since the inner 10mm-15mm or so doesn’t really do much for the strength of the axle, some manufacturers offer “gun-drilled” axles. The weight savings are an obvious benefit (around 4 kg.), but so is the reduction in rotating mass.
If you order gun-drilled axles, make sure the bores are honed. Honing removes any small grooves, caused by the drilling process, which could develop into stress risers. Some manufacturers use hollow bar, which may also need to be honed internally.
Axles can be made in any good machine shop. The splines don’t need to be broached or rolled; they can quite simply be done with a key cutter, as no shoulder is required as with the originals.
Lengthening axle shafts
Lengthening axle shafts isn’t something I would normally recommend, but since the buggy is extremely light, and the torque of even a (T.O.R.C.) legally tuned Kawasaki ZX11 motor isn’t much more than 82 lbf ft, the method described here will be more than adequate for the job.
You will need to cut up two more axles and sleeve them into a length of seamless 5mm wall pipe. If unavailable at your local steel yard, this sort of pipe can usually be located at hydraulic cylinder manufacturers. The pipe’s bore must be either the same diameter as the OD of the shafts, or slightly smaller, and then bored out to be a snug fit around the shafts.
Before attacking the axles, remember the rule about maintaining their relative direction of rotation to avoid them unwinding.
Cut the axles 100mm from the boot bumps, towards the axle centre. Grind down the shoulders as described above. Find that bit of paper with the axle length written on it, and cut the seamless pipe so that when the axle ends are pushed in, the pipe butts up against the first boot bumps.
Drill two 10mm holes clean through each end of the pipe. Centre punch and drill the first hole 15mm from the end, and then rotate the pipe 90 degrees, and drill another hole 85mm from the end.
Have a dry run and measure the whole sleeved axle again to be absolutely certain it’s the correct overall length. When you’re satisfied with your measurements, rose-weld the 10mm holes through to the axle shafts and then seam weld around the junction of the pipe and axle shafts.
If you’re mother/wife/girlfriend is out, turn the kitchen oven on to high. Make the welds one at a time, and put the axle in the oven, turning the oven off, to allow the assembly to cool down as slowly as possible. Don’t open the oven door until it is completely cold!
Make sure you get enough penetration in the welds. If you haven’t got a man-enough welder, or don’t have the confidence, take the shafts to a professional to be welded.
As long as everything was kept reasonably tight, the lengthened axles should run fairly true. If they aren’t true (roll them on a flat surface to find out), you may need to “nudge” them in a hydraulic press.
Finishing the axles
When you get your new axles, or finish lengthening some, the splines will need to be relieved in the same manner as described above.
It’s a good idea to “soften” the whole surface of the shafts (billet or lengthened) with a bench grinder-mounted wire wheel. Paying attention to all sharp edges and the welds on lengthened and welded shafts will help prevent stress-risers from forming.
Some form of protection is required to prevent the axles becoming rusty and looking shabby. The hail of muck from the front tyres will blast off paint and powder coating, as the axles are in the direct line of fire.
I’ve found wrapping PIB self-amalgamating tape, Fusit tape or non-adhesive PVC electrical tape (the same as the tape used for wiring looms) in a spiral around the axles works really well. It stays put, as the boots overlap the ends of the tape, and it will resist small stones and muck because the tape has a cushioning effect.
“Hand” the axles by replacing the green and red tape bands on the CV sides of the boot bumps. Without these indicators you could twist an axle in two if, at some point, it were installed the wrong way round.
Fitting the axles and boots
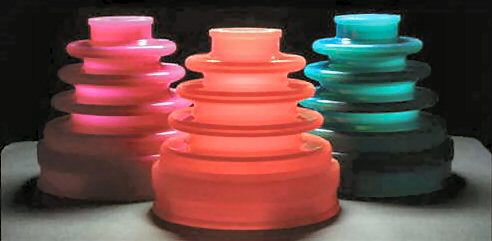
If you plan on reusing the original boots double check them at this time for any signs of perishing or small cracks. If in any doubt at all as to their integrity, it will be cheaper in the long run to replace them with new boots now.
Boots may seem expensive, but it’s worth paying the money for quality ones, as they are the CV’s first line of defense. The German boots are the best of the rubber ones, but there are some really hard wearing silicone and polyurethane boots available nowadays.
Some new boots come with a small hole in the bellows area. I’m told this is to vent the boot, to prevent it from blowing off when the internal air heats up during use. Properly maintained CVs wont get too hot (cautiously put your hand on one after a race. If it is really hot, it’s time to service them).
If air can escape through the hole, then so can hot grease, and moreover, dirt and water can get sucked in! If your new boots have these vents, just bung the hole up with a dab of silicone sealant before the boot comes into contact with any grease.
Only use grease containing molybdenum disulphide. Any other grease just won’t do. Period. “Moly” grease is formulated to withstand both extremes of pressure and temperature; something your CVs will thank you for. Some aftermarket boots aren’t compatible with mineral based grease, so to be on the safe side, go for a fully synthetic grease such as Red Line CV-2 Grease.
Smear some grease around the inside of the small ends of two boots and slide them over the ends of one of the axles. Push one end of the axle into a CV in the cassette. Disconnect the upper wishbone from the top of the upright, and pull the upright out and down as before, and insert the other end of the axle into the upright’s CV. You may need to turn the wheel a little to align the CV’s splines with the axle’s splines. Reattach the upper wishbone to the rear upright.
Using a small blunt screwdriver, tyre iron fashion, lever the large mouth of the boots over the lips of the boot flanges. Take the cable ties, and snug them down well on both ends of the boots.
Repeat the process with the axle on the other side of the buggy.
Billet axle suppliers
Transform, 2105 W. Cowles St. Long Beach, CA 90813 (800) 508-7267 Fax (562) 435-8098
