Everthing you need to know about CV joints and your buggy…
What is a CV joint?
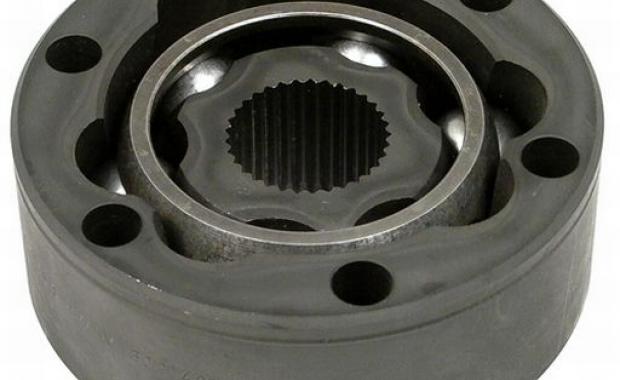
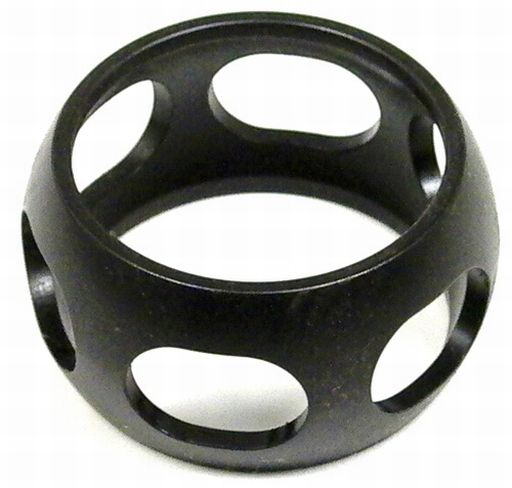
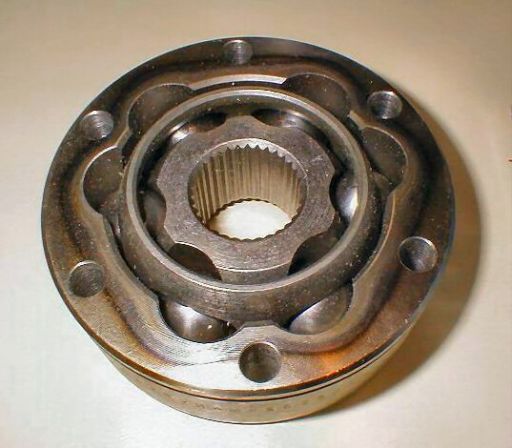
The constant velocity joint is a flexible coupling between a drive shaft and a stub axle, or gearbox flange, and was patented in 1929 by Alfred Rzeppa. At the centre of the joint is a race or “star” or knuckle, with internal splines. The star fits onto the splines on the end of the axle shaft, and is usually retained by a snap ring. The star has six rounded tracks or cross grooves, which run at opposing angles across it. Six ball bearings run freely in the cross grooves, but are retained by a cage with six oval windows. The six balls protrude through the windows, and engage with six cross grooves machined into the outer CV housing. The housing has six mounting holes, which allow it to be bolted to an output flange or stub axle.
Therefore, the axle can transmit uninterrupted power through the star, via the six balls, to the CV housing, which is fastened to the hub, all the while, accommodating rotation of the wheels, and in the case of front wheel drive cars, steering angulation too.
The grooves in the cage and housing allow for the plunging action of the axle, as the suspension rises and falls (shortens and lengthens), thus, also providing vertical motion.
On front wheel drive cars, the outer CV joint, a fixed joint, is actually part of the stub axle. The CV joint on the inboard end of the axle is the plunging joint which accommodates the change in axle length as the suspension moves up and down.
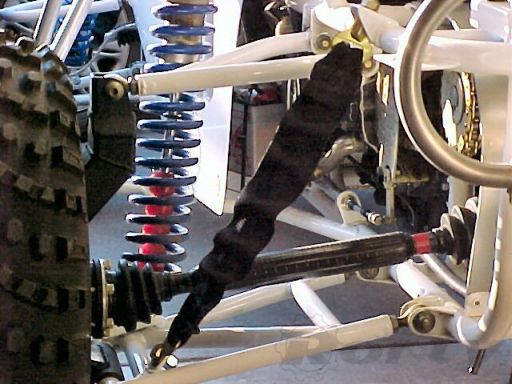
CV joints require a lot of high performance grease to carry away heat, lubricate and cushion the internal surfaces against shock. A neoprene, polyurethane or nitrile rubber convoluted “boot” is employed to contain the grease, and also to prevent the ingress of dirt and water. The boot is clamped at one end to the axle and at the other end, to the CV housing. If dirt were to impregnate the grease, it would perform like grinding paste, and cause premature wear of the joint.
One of the most frequent causes of CV failure is a split or loose boot. Boots need frequent inspection, as the bellows-like covers are susceptible to damage from the constant flexing, heat and naturally occurring ozone.
Ultimately, the CV’s lubrication will dry out, and will need to be cleaned out and replenished. That’s usually when you find out the boot is cracked and about to fall apart!
The sourcing of CV joints
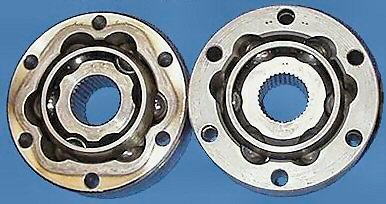
If you’ve got plenty of money, you can buy new CV joints over the counter. They’re pretty expensive though. I pull all mine off cars at my local wrecker’s yard. The ones you want are 100mm OD, 39.5mm wide,with a 82.7mm PCD, and are found on a number of BMW cars.
Don’t confuse them with the 100 mm OD CVs from a VW Type2 (Bus) or Type 4. The width of the Volkswagen CVs are only 32mm and 34.20mmrespectively and offer much less travel because of the restricted plunge.
The much lauded Porsche “930” CV joint is 40mm wide, but is 108mm OD (the exact same size as some 5 and 7 Series BMW CV joints), and only offers one degree more angularity than our BMW 100mm OD CVs.
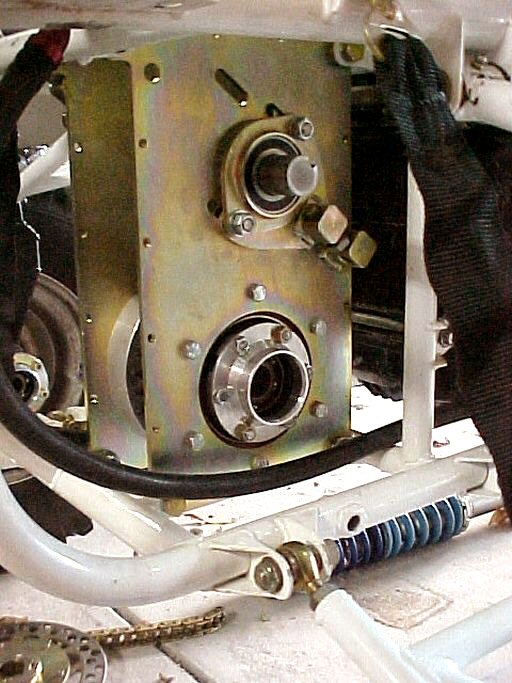
The reason you need 100 mm CVs is because they have to fit inside the100mm bearings, both in the cassette and the rear uprights. So, all together, you will require four CV joints all together.
Tools and Materials
You wont require very much stuff to extricate the CVs from the car, but a few items will be required to dismantle, fettle and reassemble them once you have them at home. Here are the tools you’ll need at the wrecker’s…
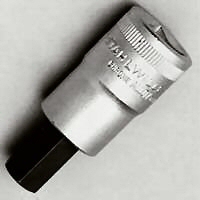
- 6mm Allen key, ½” drive.
- 8mm 12-point driver, ½” drive.
- BOS (Big Old Screwdriver).
- Coarse carborundum valve-grinding paste.
- Electrical tape, green.
- Electrical tape, red.
- Half a dozen ice cream containers.
- Pair of pliers.
- Pair of Vicegrips.
- Piece of 6mm vinyl hose.
- Short length of stiff wire.
- Wire brush.
…and these are the items you’ll need to dismantle and rebuild the shafts and CVs:
- Abrasive cut-off saw, or 9” angle grinder.
- Drum of kerosene, mineral turpentine or thinners.
- Large cook’s sieve.
- Pair of aviator snips.
- Pair of external circlip pliers.
- Pair of leather gloves.
- Plastic basin.
- Pneumatic die-grinder, sanding arbor, and 19 mm 80 grit sleeves.
- Molybdenum disulphide grease.
- Nylon bristled washing up brush.
- Tooth brush.
- Torque wrench.
- Zip-lock bags.
Pulling the CVs
Don’t climb under the back of the first BMW you see and pull the CVs. Do a little research first, as some of the CVs may be very worn and some may have been replaced with new or reconditioned units. Grab hold of the axle, and try to wrestle it in and out. There should be some plunge, but there should be only the smallest amount of rotation before the wheel starts to move.
Have a look at the boots, as they are a good indication as to the general condition of the CVs. If any of the boots are broken or missing, keep going until you find a car that’s been better looked after. When you find a good looking donor, test the boots by squeezing them if you hear air whooshing out. Check where the air is coming from. Sometimes the boots will rupture just as you squeeze them, as they can get very brittle and crumbly. If the boots are essentially in tact, you’re in business; you can always buy new boots! Time to grab the toolbox!
All the usual safety procedures apply here; use axle stands or piles of wheels to support the rear of the car, and chock the front wheels to stop the car escaping. It pays to keep the rear wheels on, so you have a method of rotating the joints, making it easier to access the bolt heads.
If you are having billet axles made, you can skip to the next paragraph.
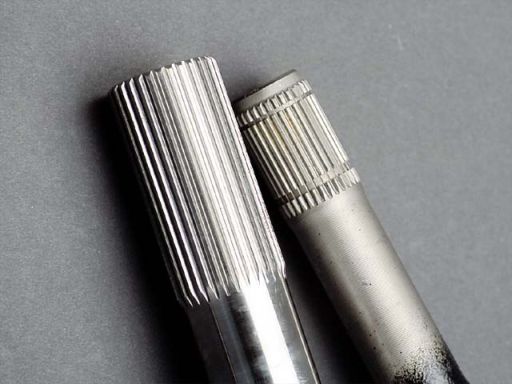
You can reuse the BMW axles in your buggy, but they will need to be lengthened. More on that in the page about axles, but for now, they will need to be “handed”, before they are removed and all clues to orientation forgotten. An anomaly of the steel in the axles is they can take on a “set”. In other words, the grain of the steel becomes acclimatised to rotating one way, and settles into that direction. (Take a look sometime, at the face of a used polishing wheel or pad. The fibres are all swept in the direction of rotation.) If the shaft were to be swapped to the other side of the car, and be subjected to a sudden torque loading, the grain of the steel would simply unravel. The result would be a snapped axle.
Give both axles a good clean with the wire brush. Tear off two lengths of green electrical tape and two lengths of red. Just before the boot on the RH side of the RH axle, wrap one length of green tape around the axle. Wrap the other length of green tape around the RH side of the LH axle. Wrap the red tape around the LH ends of the axles. Even if one bit of tape gets damaged and falls off, you’ll still have another colour-coded indicator. In international nautical terms, green indicates starboard (right), and red indicates port (left).
Do not scratch or mark the axles in any way, as any nicks could become stress risers, with catastrophic results.
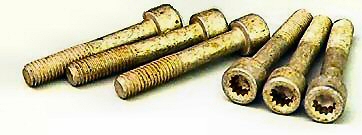
There are six bolts through each joint, bolting the joints to the differential at one end of the axle, and the stub axle at the other.
Give the general area around the CV a good clean up with the wire brush, paying particular attention to the cap head bolts.
Use the bit of stiff wire, to dislodge some of the crud that will be baked into the sockets in the ends of the bolts. Take a bit of small-bore hose, and blow out any remaining dust.
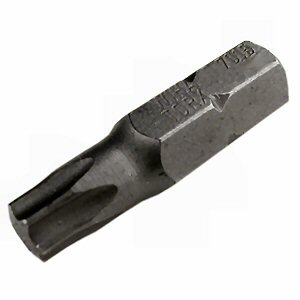
While you’re doing that, examine the sockets in the bolt heads. Some bolts are plain in-hex cap heads, while the factory original bolts are internal 12-point, or “triple-square”, and require a special 12-point driver. These fasteners are definitely not Torx fasteners, so don’t even try using a Torx driver in them, and an Allen driver won’t fit either.
Once you’ve settled on the correct tool for the job, dip the tool tip into the grinding paste. A very light coating will bite into both the tool and fastener, preventing it from rounding out the socket. It’s a good idea to give the driver a couple of good sharp whacks into the bolt socket with a hammer, as the shock can often ease a seized bolt that wouldn’t otherwise come out.
Start on the bottom bolt and “crack” it. By that I mean, push the driver firmly into the socket, and give the ratchet handle a good sharp tug to break the bolt loose. Turn the wheel until the next bolt comes around to the bottom and crack it. Continue to crack all the bolts, before completely un-doing them. The reason for this is if there are a few bolts that either strip the socket out or wont crack, then you have the option of looking under another car rather than wasting your time removing the rest of the easy ones.
If you do strip a bolt head’s socket, you may be able to use a pair of Vicegrips to remove the bolt.
If all goes well and the bolts all loosen, move to the opposite end of the shaft, and repeat the process with the six bolts there. Once you have loosened all the bolts on one axle, you can start removing them.
Leave one bolt loosely holding each CV just to support the assembly, and when you’re ready, grab a hold of the axle, and remove the last two bolts. The combined axle and CVs are a heavy unit, and you don’t want just one CV supporting the whole lot. The cages are tough but brittle, and unusual loads can crack them, rendering the CV useless.
Remove as many axles and CVs as you need, and if there are an abundance of BMW wrecks in the yard, pull a few more for spares. It’s always prudent to carry a pre-lubed spare, sealed in a really big zip-lock bag, in your toolbox when you go racing.
Place your hoard of bolts, axles and CVs in plastic bin bags, and wrap them up securely for the trip home.
Dismantling the axles
Right, now it’s time to get even dirtier! It’s hard to imagine how much muck and grease is contained in the average second hand CV. I strongly recommend you buy a bag of workshop rags to clean up as much of the mess as possible.
With second hand CV joints, you can never be certain whether a joint has been reconditioned or not (unless you measure the balls with a micrometer). CV reconditioners typically retro fit 0.50mm oversize balls into reground cross grooves, so you don’t want these parts getting mixed up with the balls from untouched CVs. For this reason, you should place all the parts from each CV into its own ice cream container, and work on only one CV at a time.
Clamp one of the drive shafts horizontally in a vice. The factory boot retaining clamps are 8mm steel bands, which have locking tabs. Use the BOS to prise the ends up, and undo both the bands. If this doesn’t work, carefully cut them with a pair of aviator snips. If you are planning onreplacing the boots, the whole thing can be cut off at this stage with the snips, otherwise slide the boots along the shaft towards each other, and remove the assembly from the vice.
If you’re going to reuse the boots, carefully tap around the lip of the metal boot rings with the BOS, until they come off.
Place the axle vertically in the vice now, and use a rag to wipe as much of the grease off the end of the axle shaft as possible. Examine the star carefully, and make a note which way up it fits on the axle, so you can refit it in the correct manner. Some stars have a shoulder on one side.
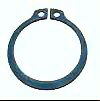
With the area cleared of grease, you should be able to see a snap ring embedded in a groove near the end of the axle. The snap ring design varies; some are just snap rings, and others are external circlips.
If you have snap rings, remove them any way you can, either with circlip pliers, or a couple of screwdrivers, but be careful, as the things can just take off, and could have your eye out!
If you have external circlips, remove them with the circlip pliers.
Once the retaining ring has been dislodged, the star, in theory, should pull off. That’s not always the case though! Minute variations in manufacturing and heat-treatment sometimes result in an too-tight interference fit. What ever you do, do not try to knock them off with a hammer; you’ll only damage them!
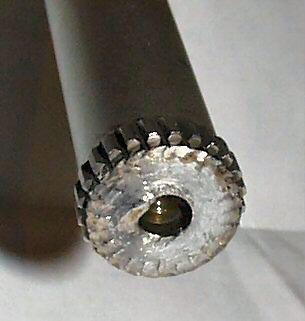
There are a couple of solutions; use a slide “hammer” or use a three-leg puller. There’s already a centre dimple in the end of the axle, so locating a three-leg puller isn’t a concern.
Never use a puller to attempt to remove the entire CV joint by locating the puller legs under the CV housing. You will probably only succeed in shattering the cage!
A simpler, and usually effective method of removing the knuckle is to use a length of heavy wall pipe as a slide “hammer”. Obviously, if you’ve been able to get one knuckle off the axle, then it’s a simple matter of sliding the pipe over the end of the axle, and repeatedly thumping it down against the stubborn knuckle until it too falls off. If you find yourself with two obstinate knuckles on the same axle, you’ll have to use your angle grinder to cut a full-length slot in the piece of pipe to allow it to slide over the shaft. Just make sure you dress the edges of the slot with a file, so you don’t cut yourself on any sharp edges.
Behind each knuckle is a concave, spring washer. Remove these and set them aside, as you wont be needing them again. With all that lot off the shafts, you can also slide off any good boots you’ve decided to reuse.
With all components now dismantled, wash the individual axles, reusableboots, remaining CV parts and bolts in the basin, give them a gentle stir, and let them soak in solvent for an hour.
CAUTION!
Solvents are flammable, and can be explosive.
Read and observe all safety precautions on the solvent packaging.
Partially fill the plastic basin with your chosen solvent, and put it on the bench now. Holding one of the CVs over the basin, twist the housing around, until one of the ball bearings is completely exposed. Sometimes the balls will just fall out, and other times, the grease is enough to hold them in. If it’s a new CV, you may need to persuade the ball out gentlywith a screwdriver.
When you have extracted the first ball, revolve the CV housing slightly until another ball is exposed, and eject it too. Soon the whole lot will drop into the basin, and you’ll be left holding the cage and housing. Be careful with the cages. They are quite hard, which means they’re brittle, and can be cracked relatively easily. The cracks are seldom visible to the naked eye, so it would be worth buying some penetrating crack test dye, such as Ardox, and testing your cages before reassembly.
Dredge the CV parts from the solvent, and if there’s any grease still attached to them, give them a touch with the toothbrush, and set them on some newspaper to drain. The inside of the boot convolutions are a great harbour for solidified muck and grease, so pay particular attention to them. Load some of the smaller items into the sieve giving them a swirl around and a poke with the brush too.
Put all the cleaned CV parts into a labelled ice cream container, and start on another one. When everything has had an initial wash, dispose of the dirty solvent in a responsible manner, not in your neighbour’s wheelie bin on bin night, as happened to me once!
Fine Tuning the CV Joints
For off-road use, it’s better if the whole joint is kept just a little loose.There may be a slight increase in noise, but it shouldn’t bother you duringracing. The benefits are that the joints will survive heavy knocks, and they’ll also handle the large, rapid changes in direction, as the suspension cycles up and down.
A new CV joint is quite a rigid assembly, making it difficult to rotate the internals by hand. If you did manage to rotate the innards of a new joint to the point where the balls could be pulled out, you’d have a hell of a job reassembling it all.
Race CVs are fine tuned by lightening the exterior of the housing, and polishing and relieving the internals. The housing is made from alloy steel, but only the inner tracks are induction heat-treated. This meansnarrow grooves can quite easily be machined away to reduce the rotating mass and unsprung weight. Do not buy regular lightened “race” CVs, as they have a wide area of material machined off the outsides of the housings, and can’t be fitted inside the R6’s bearings.
The depth of the case hardening of the tracks is in the vicinity of 1.2mm to 2.5mm, so some grinding to a depth of 0.25mm by specialist CV reconditioners (to accept 0.50mm oversize balls) is possible, and light honing by racers is perfectly acceptable.
Highly accurate machines using CBN coated grinding “stones” are used in the regrinding process, and should not be attempted with a hand held die-grinder in the home workshop.
Don’t use any pitted or scored parts, as they will promote rapid wear and consequently, the whole CV joint could fail. If you find any pitting in the cross grooves of a star or housing, just use one of your spare CVs, but don’t throw out any damaged stars yet!
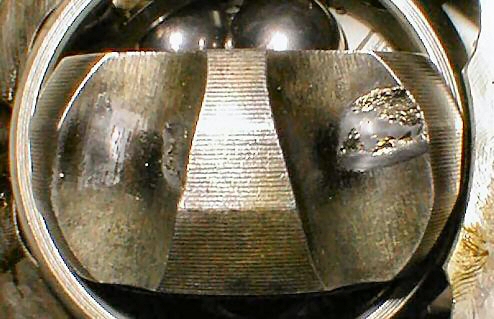
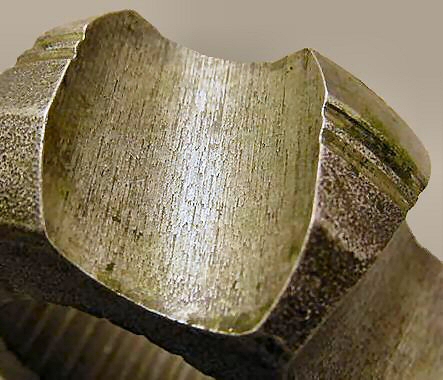
Part of the housing and star manufacturing process involves broaching the cross grooves. The drag marks on the surface of the grooves are usually clearly visible. All the bearing surfaces need to be polished with aluminium oxide abrasives.
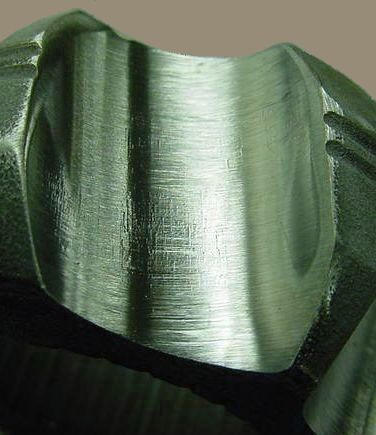
Pick a sound, clean star and clamp it in the vice so about half of it is above the vice jaws. Mount an expanding arbor in the die-grinder, andpush a 80 grit sanding sleeve onto it. Holding the die grinder with both hands, lightly polish the entire surface of each cross groove. Don’t apply too much pressure, and keep the axis of the arbor aligned with the axis of the groove at all times. The object is to achieve a uniform light grey finish with no shiny spots.
Clamp the CV housings in the vice, and give their cross grooves a light polish too.
The cages require a lot of fettling, but being a difficult, frail item, are easier done while being held in the hand. Put on the gloves, and holding a cage in one hand, give the windows a very light “lick” with the drum sander. Make sure the drum’s axis remains at 90 degrees to the cage’s axis, and keep the sander moving in a controlled circular motion around the inside of the windows. Don’t let it dwell on any one spot, or you will create notches, which the ball could get hung up in. The object of this process is to slightly relieve the windows, while at the same time, softening the edges of the openings to prevent stress risers and subsequent cracks from forming.
Stop frequently, and try a ball in the window. It shouldn’t bind anywhere in the window, and should just be able to drop through without having to be forced.
Finally, very lightly, sand both the inner and outer sharp edges of the windows. Remove the absolute minimum amount of material. Test with a finger, and if it feels sharp, give it another light lick.
Reassembling the CV joints.
Swill the basin out with clean solvent, and wipe it clean again. Refill the basin with solvent, and give the CVs a final rinse, and again, drain the parts on some newspaper. Dry the parts with a clean rag, and place them on clean newspaper.
When you dismantled the CVs you noted the exact way the parts were oriented, didn’t you? You probably even took a photo of them, right? Good!
Place an old towel on your bench, to catch a ball bearing just in case you drop one. They must not get dirty again or scored.
Hold a star in one hand, and set a cage over it, and the housing over both of them. Slightly twist the star and cage up, and drop a ball into a pair of matching grooves. Drop another ball into the adjacent grooves, and keep going around. With a bit of careful juggling, the last ball will drop into place. Remember, narrow groove spacing in the star goes to wide groove spacing in the housing!
Give the whole CV a light spray of WD 40 or Inox, and place it on another clean newspaper to drain.
When they are all similarly clean, lubricated and assembled, put them away temporarily in zip-lock bags.
Remounting the CV Joints
When reassembling the CVs and axles, you must observe the highest degree of cleanliness, as the grease can attract particles of metal swarf and grit alike. Any such foreign bodies will wear a CV’s internals very quickly.
An extreme pressure grease must be used such as Red Line CV-2 Grease. If using another brand of grease, make sure it contains molybdenum disulphide. No other grease will do the task.
Pack the grease into the CV as if it were any other bearing; about 100 grams is enough.
Use a ruler or flat stick to spread the grease throughout the cage and bearing area. It’s false economy to over fill the joints, as too much grease will merely work its way down into the boots, though there’s no better indication of a split or perished boot than when you see a dirty black trail of grease up the side of the buggy!
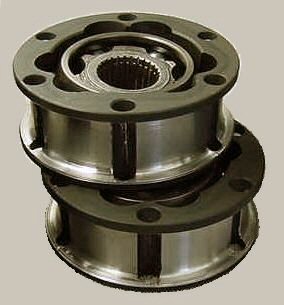
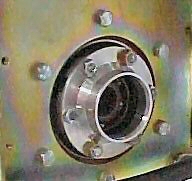
Mount the two inner CVs in the cassette, along with their wide-angle boot flanges, and pass the long 8mm cap head bolts through the whole assembly. Torque the lock nuts to 25 lb. ft.
Press the two outer CVs into the hub bearings, assemble the remainder of the hub components, and again, torque the fasteners to 25 lb. ft.
BMW Cars Using The 100mm x 40mm x 82.7mm PCD CV Joints.
BMW: 1500, 1502, 1600, 1602, 1800, 1802, 2000, 2002, 316 (6.’75-8.’78), 318 (6.’75-8.’78), 320/4 (6.’75-8.’78), 320/6 (6.’75-8.’78), 320i (6.’75-8.’78), 323i (6.’75-8.’78), 518 (6.’72-9.’78), 520/4 (6.72-9.’78), 520/6 (6.’72-9.’78), 520i (6.’72-9.’78)
Chrome Moly CV cage suppliers
Albins Off-Road Gear
(Ivan Albins makes Chrome Moly cages for most CVs, and will also make specials to customers’ requests.)
Weddle, PO Box 15466, Long Beach, CA 90815 (562) 598-2731
(Weddle are the American agents for Ivan Albins CroMo CV cages.)
